Friday, February 27, 2009

NATURAL DYE WORKSHOP IN OAXACA

My recent trip to Oaxaca luckily coincided with a tee-shirt dyeing workshop at the Textile Museum there. Seventeen participants of all ages and languages (spanish and english at least) joined in with teacher Eric Chavez to learn about dyeing with natural indigo, extracted from the anil plant.After a brief, bilingual (thank you Eric) media presentation about indigo, the process and the options for resist dyeing, we set to work tyeing up our shirts with either stitching, rubberbands, or marbles.

After tyeing, we tied a string onto our bundle and gently set them into the garbage can that was half full of indigo dye.
We let them sit in the dye bath for about 5 minutes, then pulled them out to set and hang while the oxygen set the dye to working.

When they first came out of the dye bath, the shirts were a sea green color, but slowly the beautiful blue emerged. We let them hang in the open air for about 15 minutes. (Perfect for viewing some of the beautiful exhibits there.)
Eric explained that the deep indigo color is achieved by multiple dippings, even up to 20! As our time was limited in the workshop, we only had time for two. To set the color, we untied the bundles and put the shirt into a bath of vinegar solution, then hung to dry.
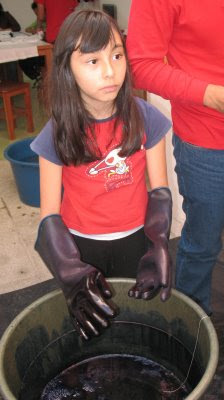
This young participant (the youngest I think) created a great shirt with marbles and rubber bands. And this young woman (who was a part of a group of young volunteers abroad) stitched a lovely diagonal resist line into her shirt.

Thank you, Eric, for an informative and fun introduction to the natural dye process.

Friday, February 13, 2009

INSPIRED OR COPIED?


Here in Mazatlan, there has been a large migration of retirees coming to Mexico, buying houses or condos, doing the decorating thing, etc. Recently a couple from Vancouver stopped by my studio and asked me to make a colorful piece for their new condo. "What do you like?" I asked them. They mentioned a large mural at a local coffee shop, showing a jungly green scene with a woman (and her baby) picking coffee beans. So I took a pic of it (above), printed it out and looked at it for days and days, wondering how I was going to interpret that. I had little experience painting whole cloth, so I decided to try it, thickening my dyes. I wanted to also outline with black and then fill in the color, but didn't know in which order to do it - outline first, or put down swaths of color first with the outlining later. The latter is what worked best for me and I practiced on a few pieces. They were quite "elementary" (I refer to it as my kindergarten art skills) but I liked the composition so decided to continue with the idea of presenting one of these to the Vancouver couple as the foundation of what I would do for them. Then I showed it to a friend and her quick comment was, of course...Rico's coffee shop! I felt I needed to make it my own, rather than a "copy" of the coffee shop scene. So to make a proposal to the Vanc. couple, I showed them 2 things: 1)the practice piece that I wide-bordered with darks and then pulled out elements within the picture to applique in the border,or 2) the same woman (made out of hand-dyes) appliqued onto black.I like them both very much and both are "new" for me. I feel #1 borders on copying, but I truly worked hard to make it my own (inspired!) but #2 is definitely mine.Maybe the fine line between copying and inspiration is a time delay of how long it takes someone to say..."that reminds me of...." I don't know...maybe you have thoughts on this. I titled the pieces "Multi-tasking 1 and 2" as they show a woman and her busy life....carrying her baby, holding a bowl of something, balancing birds and other items on her head...sounds familiar, yes?

DIA DE AMISTAD

Here in Mexico, February 14th is celebrated as El Dia de Amistad (day of friendship). In that light, I send hugs and warm wishes of love to all my fiber-loving friends! Wish we all could be quilting or dyeing or creating together!...Mary

Saturday, February 7, 2009

SILK PAINTING 101

I love receiving my monthly online newsletter from Dharma Trading Company, my fabulous supply house for most of what I use in my work. They always have a "featured artist" section which I consistently peruse for new and interesting ideas and connections. February 2008 had one artist by the name of "Silkpainting in Haiti" which caught my attention instantly. Simply put, this is an economic development project in rural Haiti which I believe started out as a silkpainting project about 10 years ago. Visit their site, artmatenwa.org, for an inspirational view of a successful creative endeavor in a third world country.
From that site, I got the idea to try to bring a bit of silk painting to our women of Mujeres Trabajadores, not necessarily to start another offshoot of their already busy sewing industry, but as something to broaden their creative perspectives. But a silk painter I WAS NOT, so I called upon my silk mentor Christine for bits of advice, ordered a dvd by Jill Kennedy, and along with a stack of silk scarves, I dabbled in silk throughout the summer to at least get a bit of a handle on this craft. Before traveling to Mazatlan this November, I ordered 30 habatoi silk scarves and a Dye-na-flow class kit from Dharma to put in my suitcase for a silkpainting class with the women.
That class happened two Mondays ago, as a demo to the group of 12, with plans to then have them sign up in groups of 4 to try their hands at silkpainting. Last Monday saw the first group at work. Here they are, step- by-step demonstrating the fun and simple craft of silkpainting with Dye-na-flow paints.

Step 1- Stretch the silk onto a frame. We used simple PVC frames with rubber bands and pins to hold the silk. Ceci, Mary and Sylvia are working together to secure the silk for painting.

Step 2 -Select your colors. With a design in her mind, Mary is selecting the colors she will use, putting 5 droppers of each into an ice cube tray. The Dye-na-flow paints seem to go a long way.
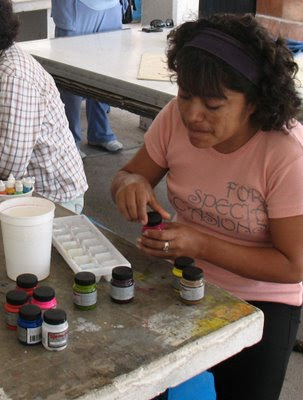
Step - Paint your silk. Silvia is carefully applying her colors in stripes.
Step 4 - Sprinkle salt or sugar on the wet silk for beautiful texture. Irma is adding silk to hers, with an interested audience looking on.
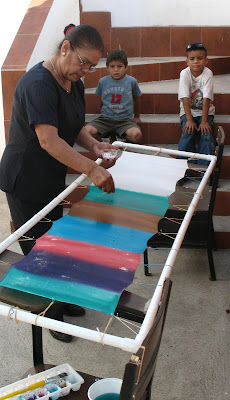
Step 5-Set the color with a hot dry iron. Ceci shows us how!
Step 6 - Rinse the silk. After ironing, Irma rinses the silk, making sure that any residual color or sugar/salt is removed. Then she ironed again for the final step.
And finally, here are the beautiful silkpainters, modeling their creations:

Irma- she is the bag queen! She makes terrific purses, satchels and bags that are popular in sales. She is a strong member of this group.
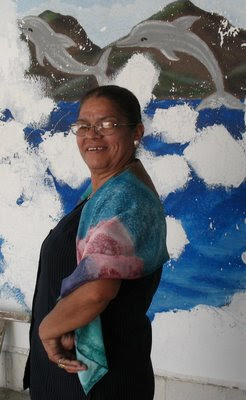
Mary is the newest member of the group. I have only known her since December. She seems very focused and organized, coming weekly with her notebook for taking notes, taking measurements for patterns, etc.. Last week, she brought her 12 year old daughter along (no school that day) who then became our helper. Mary makes sure her daughter comes to the community center for extra help in English. I believe she knows the importance of grasping opportunities.


Ceci is a true artist. She is not afraid to try her hand at some type of artistic embellishment on her sewing products. And oh, how she can sing!Sylvia is an energetic, happy sprite of a woman. She is a good sewer and adds much energy to the group. This year she is in charge of scheduling sales venues and organizing the sales staff.
I was so impressed with how quickly they picked up on the process. After the one demo two weeks ago, they jumped in and barely needed any direction.
Plans are to continue with all the women on painting one scarf, then to try another using gutta resist. We'll see how it goes and I'll report in April on the results.