Showing posts with label surface design. Show all posts

Monday, December 2, 2013

30 MINUTES OF FUN, PART 2


The process of using a quilted piece as a print plate (my last post) was so intriguing that I thought my friends might like to try it too. I invited them to make a free-motioned piece, cover it with a sheer poly, burn or melt the sheer (for texture), then we would get together for a print-fest (regular Monday afternoon dye session). Both Cynthia and Christine produced some interesting free-motion patterns that printed up really well. Cynthia printed the one above and this floral/leafy one below.
 

You can see Christine pulling the print (white) off of the quilted fabric plate (gold and black) below. Great design, yes?


Here is another of hers where she used both yellow and black print paste for the printing.

 
I printed some up too but the quilt plates I made were more of a solid pattern, and the results were less than interesting. Next time, I will follow my friends' examples and stitch in different elements.
 
What  have I learned about printing quilted pieces?
-Begin with an interesting quilted pattern that has some focal elements;
-When brushing or rolling the print paste onto the quilted print paste, use a light touch. You want good coverage on the high spots, but don't press so hard that you mash the fabric down. Christine used a brush and I think more definition emerged.
-Print paste should a good consistency...not too thick and not too thin.
-I don't think that the whole burning/melting thing is really necessary for printing. I think it detracts from the finished pattern on the print.
-Two colors add good interest.
 
For now, I've had enough of this little experiment, but it's still back there, swimming around in my head. Also swimming in there is my upcoming migration to Mexico, so further printing of quilted cloth will have to wait. I have some ideas brewing...for warmer climates!!!
 
-


Monday, September 17, 2012

MANIC SCREENING


After our retreat, I was on a roll: my studio was all set up, the dyes were made, and I was excited to try my hand at more screening. PLUS, the days were beautiful and warm, perfect for drying the screens (like the one above), and for hanging the fabric on the line.

Cathy was keenly interested too. She joined me for two or three days, as we eached produced a meter a day. In the piece above, she tried to create a mountain scene, and I think she succeeded.


After the initial screening dried, a top color was added. In our case we just smeared a thickened dye on with a credit card.


My favorite objects for creating the screen design were heavy cotton string, coins, and poker chips. Cedar boughs, lace, fishnet, and plastic mesh also created interesting textures.
Now I am the owner of eleven beautiful meters of screened fabric, with a winter of time to use it!

Friday, August 31, 2012

SUPER RETREAT!

What a weekend! Dawn, Terry, Ellen and I had three FULL days of fabric dyeing and creating. It was amazing!


My three friends (connected through Quadra's Quilt Guild and Cyber Fibre's quilt journal group) boated over to Refuge on Saturday morning, hauled their gear up the hill and got right to work. Each found their spot in my makeshift studio (once woodshed) and began producing amazing pieces of dyed and designed fabrics.

Here's a list of what we did:
deconstructive screening

stamp making and stamping

flag fold dyeing
monets
moon dyes
snowflake/star folds

shibori/bottle wraps


starbursts
cheese cloth prints
fish net prints
found object prints
wheat paste prints
crossover dyeing

stitched shibori prints
overdyeing
filter wraps

discharging with decolorant and bleach product
thickened dye painting
credit card smears
Shiva paint stick rubbings

PLUS, we shared great meals, stories and ideas. What a great weekend! AND I have over 5 meters of beautiful fabric to create with! Thanks friends for such a good time together. Can't wait until next year!

Wednesday, August 22, 2012

MAKING STAMPS


Earlier this month we had visitors Christine, Rick, Kathe and Mike come to Refuge Cove to enjoy some time with us. What a treat!

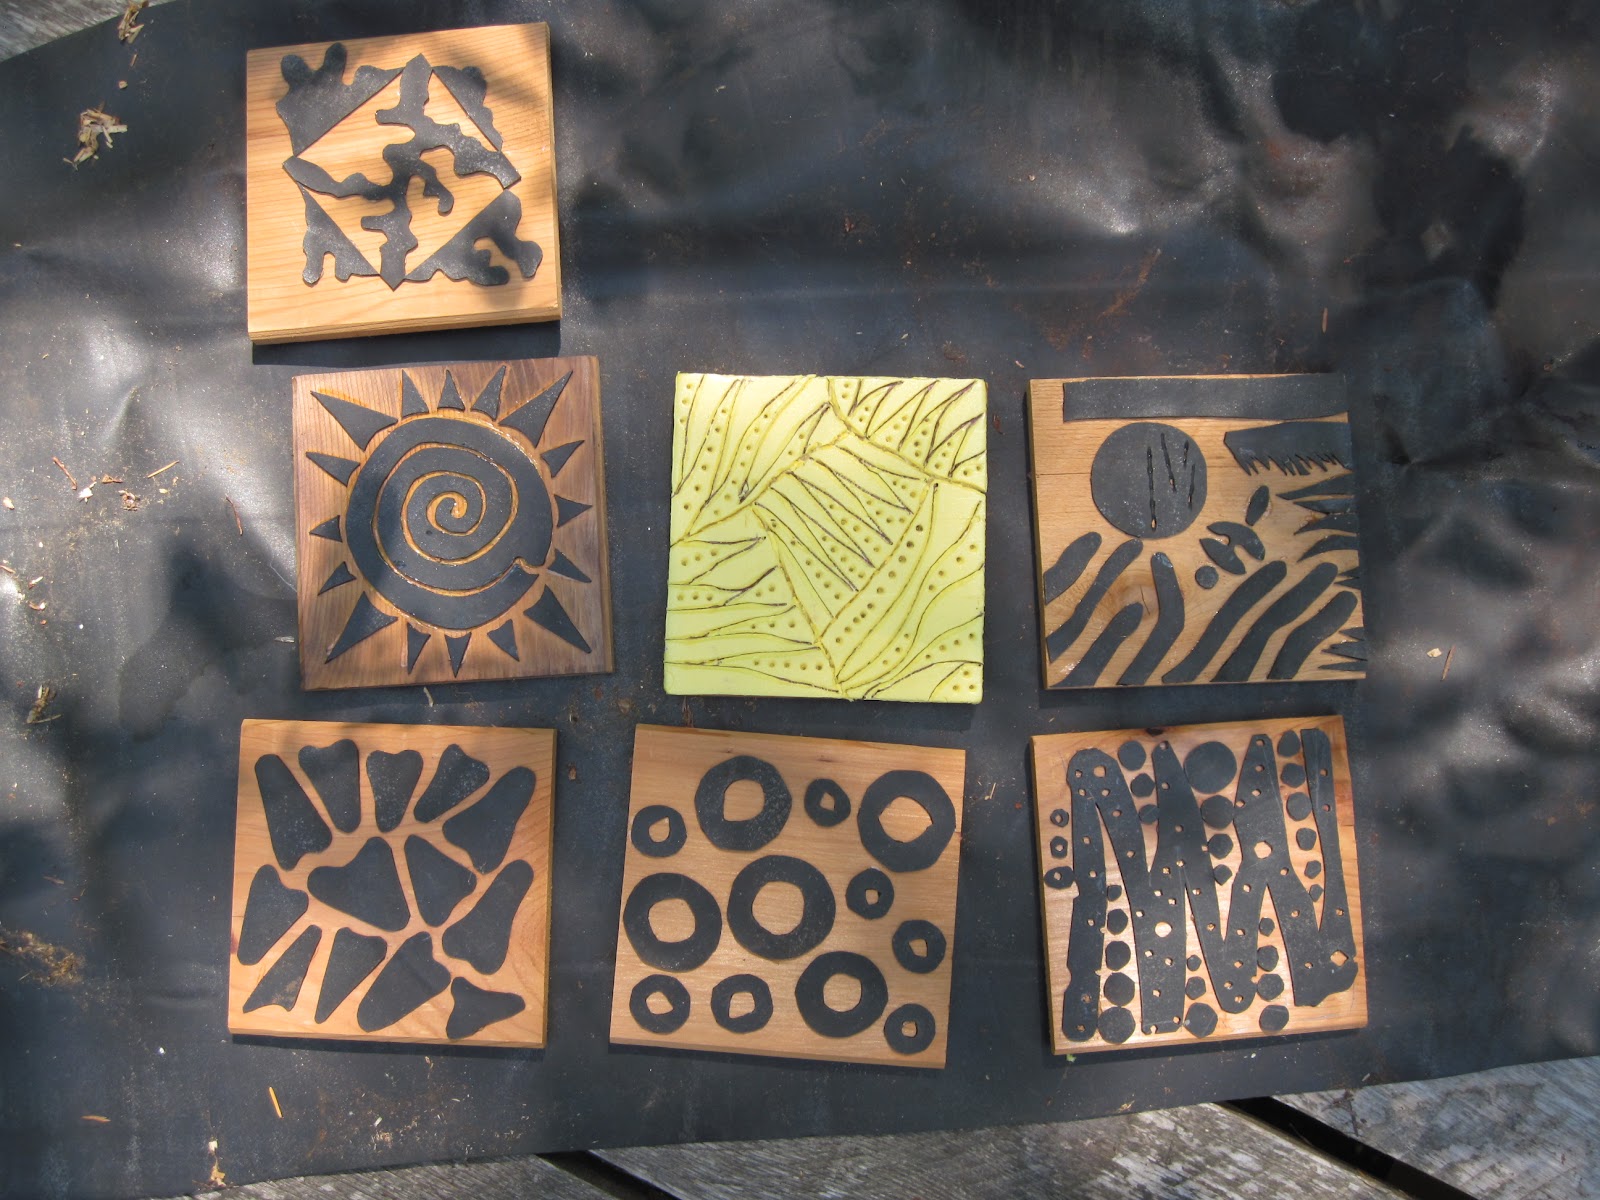
And, we gals made some time for some creative fun. The remnants of our pond liner (thick, heavy duty rubber) became the medium for creating stamps. Add cedar blocks, scissors and waterproof glue, along with some imagination, and we were good to go.

These are wonderful little stamps. The rubber lays down well and the glue secures all edges. Get them wet with thickened dye, then wash them, and they are good as new.

Last week I made up some print paste with some OLD purple dye and proceeded to fill up some fabric. Yesterday I added some background color.

This stamp is made from a styrofoam meat tray that was just waiting for a design. I used a pen to scratch it out.

Thanks Christine and Kathe for a great time together! I'll be making some more of these stamps soon!

Wednesday, October 19, 2011

SCREENING

Now in Oregon, I have pick of activities to choose from: classes, groups, sessions and workshops, all fabric related of course. I'm like a kid in a candy store. Today's item on the agenda: screening with Christine. Once my neighbor in Alaska who I taught to dye, she now is my southern Oregon neighbor who has pursued this craft to the "nth" degree. She always has something new to show me.
This year it's screening. You know, like silk screening, but with a twist.


She set up the screens a few days ago with a thick layer of print paste and then imbedded all sorts of textured objects into the paste and let it dry. We pulled off the objects and were left with our screen for printing. The hardened paste was a dark color and I chose a ruddy brown as my printing color.


On the screen, the wet began to break down the dry and the pattern emerged onto my fabric as I sqee-jeed across the screen. I filled up my meter of soda-ashed cotton and set it aside to cure.


But there was more to show me. She pulled out her collection of textured goodies and high-density foam roller and set to demonstrating how to put these beautiful textures onto fabric. Not only could we place the texture under the fabric while rolling on top, but also roll over the texture with the high density foam and capture the pattern for a quick transfer. I loved every minute of this process and my mind started reeling with possibilities. I went on to try a few stencil transfers and of coursed watched Christine with her creations too.
At the end of our session we set up the screens with more print paste and a new texture design. They will take a day or two to harden and be ready for more printing.

Now curing, the fabrics will be ready for adding a background color in a day or two. For now, I am searching out online silkscreen frames to haul to Mexico to continue the fun down there. Muchas gracias, Christine.